Lip @ 400 grit:
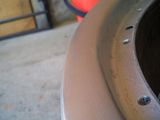
Lip @ 1000 grit:
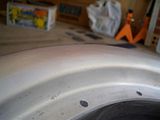
Lip @ 2000 grit:
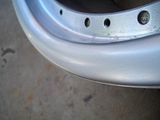
Next was polish. I bought a kit from Bunnings that was a straight attachment to my drill. Came with black and white polishing compound, as well as the appropriate mops for both.
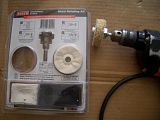
The black compound, used with the sisal mop, cuts the metal first to take care of any scratches still on the surface after the sanding. The white compound, used with the loose mop, brightens the metal up to give that "mirror-polish" lustre.
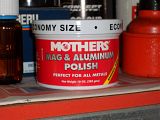
After the polishing, I buffed it with Mothers Mag Polish:
This was my first time metal polishing, and the results were far from perfect. There were still quite a few scratches that remained after polishing (though minor). I may have spent too little time with the rough grit sandpaper. Or it could have been the polishing kit being inadequate. My polishing technique could be to blame as well, as my polishing left a lot of black residue on the mops and the metal itself (easily taken out by Mothers Mag Polish though). Could be a combination of the above.
Anyway, the results:
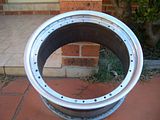
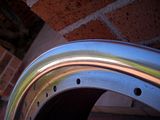
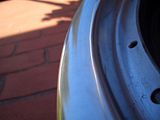
Hard to capture the metal polish and the scratches, but they're the best pics that show it.
The photos were taken by your average consumer pocket camera, as I hadn't bought my DSLR at the time, so this polishing job was done more than a year ago.
Until about 2 months ago, I put this wheel project on the shelf. The polish tarnished a bit, leaving some oxidised markings. But they cleaned up well with another buff of the Mothers polish.
With University enrolment to take care of and a trip to Melbourne to prepare for, I had very little time and money to fulfill my idea of polishing all the barrels perfectly and having the centres powdercoated gold. But with SEDF coming up, I really wanted to fit these wheels on. First of all, I needed adapters so I went to Adaptec Speedware, run by Matt Crooke in the US. Having tried out adapters before, I knew what I wanted this time around and wasted no time ordering them. 5x100 --> 5x112, 15mm pair and 25mm pair and hub-centric to VW hubs and wheels in anticipation of using Audi wheels in the future. Paid ~$450AUD landed for them, which I thought was a fantastic price considering he whipped them up during New Year's for me, and Express-posted them. Paid on X'mas Day, machined, packaged and delivered by the first week of the New Year, there's nothing to complain about really!
Actually there was one thing... instead of having pressed studs on the adapters (so I could just use nuts to hold down the wheel to the adapter), Adaptec tapped threads into the adapter instead. Which actually isn't really a bad thing (even better I think, with safety in concern), but it meant that I had to get my own wheel lugs, as I only have ball-seat lugs and the RSII have conical seats. I'm only complaining cos I didn't reserve enough time to order in custom wheel lugs as the 15mm are seriously thin - a dummy fit with the stock VR6 ball-seat wheel bolts showed that when torqued down tight, the end of the wheel bolt sits just flush on the other side of the adapter... fit was incredibly tight. I actually still on the look-out for suitable conical seat wheel bolts... fingers crossed I'll find them by SEDF.
As for the colour scheme for the wheels, I had to think of something that would be relatively easy to knock out in a couple of days...
No comments:
Post a Comment